Turn Your iPhone into a Webcam (No Tech Wizardry Needed!)
Tired of grainy webcams making you look like a potato on video calls or streams? What if I told you the best webcam you own is already in your pocket? That’s right – your iPhone can be transformed into a high-quality webcam with just a few clicks. Even better? You don’t need a MacBook, and no advanced tech skills are required! Let’s upgrade your setup with minimal effort and zero frustration!
HACKS
Ryan Pearson, CNVP
1/17/20255 min read
What drove me to digging into this?
When I went back to school for cybersecurity, everything was remote, including presentations. I wanted to record videos with my iPhone to use the better resolution camera, but the process was tedious:
hit record, sit down, stop record and play back, check the frame, hit record again, and finally do the thing... then probably need another take on something, repeating the process over again.
It was frustrating, and I knew there had to be a better way.
Fast forward to today, I’ve discovered easy solutions that save time and turn your iPhone into a professional webcam – perfect for streaming or video calls. Let’s dive in!
Hack #1: How to Use Your iPhone as a Webcam
Tools You’ll Need:
An iPhone
OBS Studio
Download instructions found here, if not already installed
OR your preferred recording/streaming software -- I'm sure others will use a similar method, but OBS Studio is what we'll be using in this tutorial
A Web Browser
If you'd prefer to watch than read, check out my video at the bottom of this page!

🍺 I am currently enjoying:
Flying Dog’s Bloodline IPA

Introduction
Tired of grainy webcams making you look like a potato on video calls or streams? What if I told you the best webcam you own is already in your pocket? That’s right – your iPhone can be transformed into a high-quality webcam with just a few clicks. Even better... you don’t need a MacBook, and no advanced tech skills are required!
In this guide, I’ll show you how to:
Use your iPhone as a webcam
Troubleshoot issues with OBS setup
Let’s upgrade your setup with minimal effort and zero frustration!

Step-by-Step Instructions:
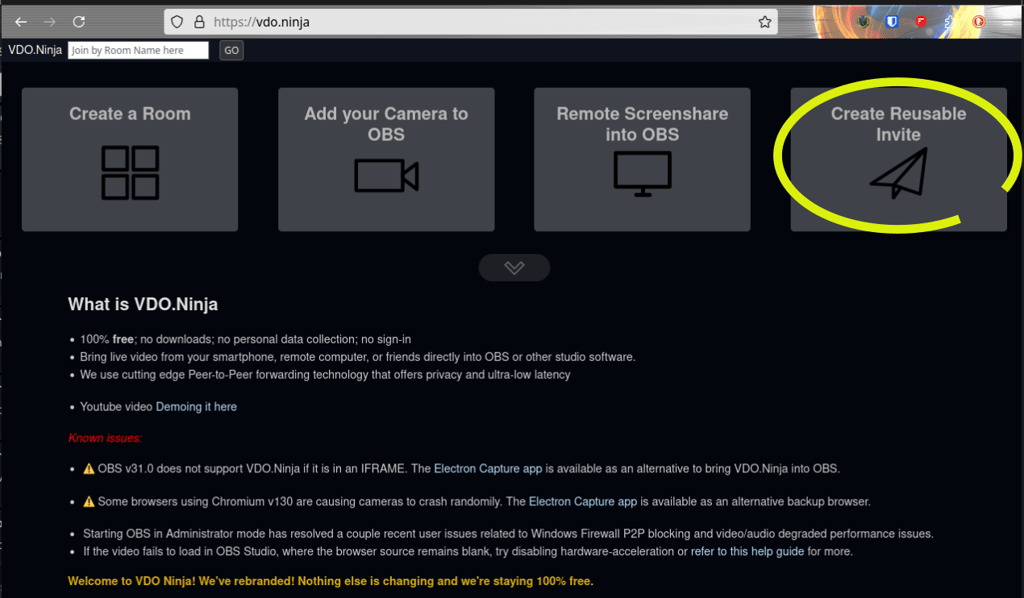
1. Go to vdo.ninja
Select this link to go to vdo.ninja (pronounced "video ninja"): https://vdo.ninja/
2. Connect Your iPhone to vdo.ninja
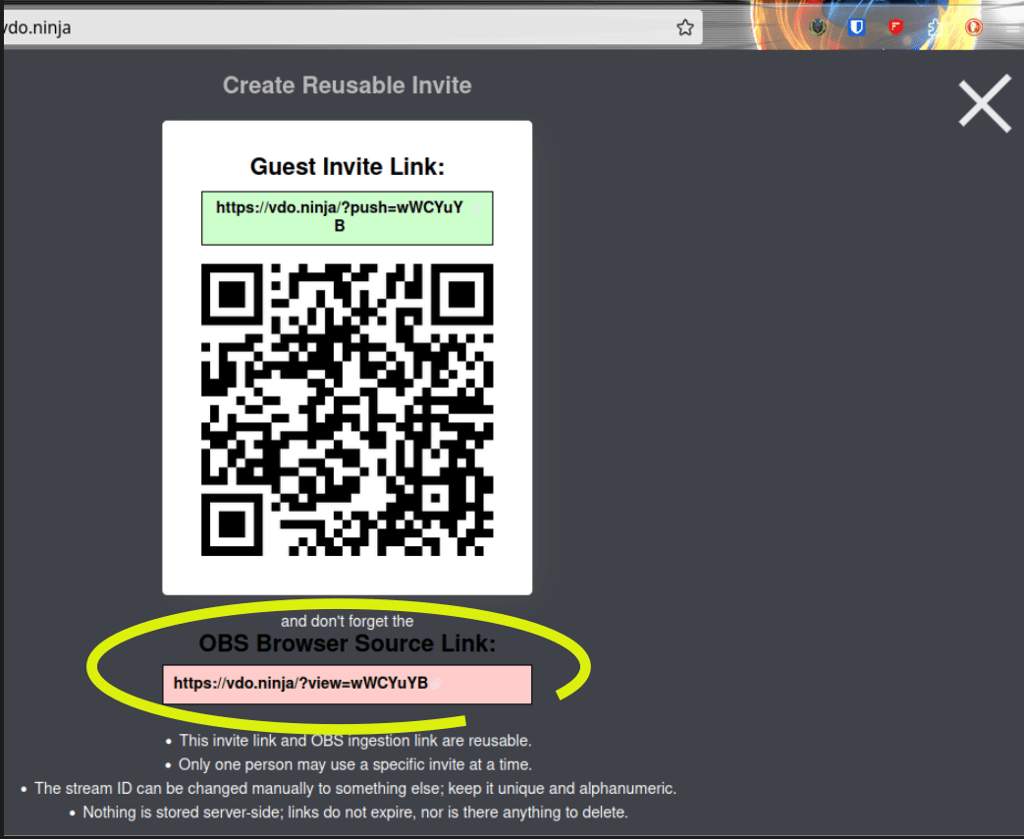
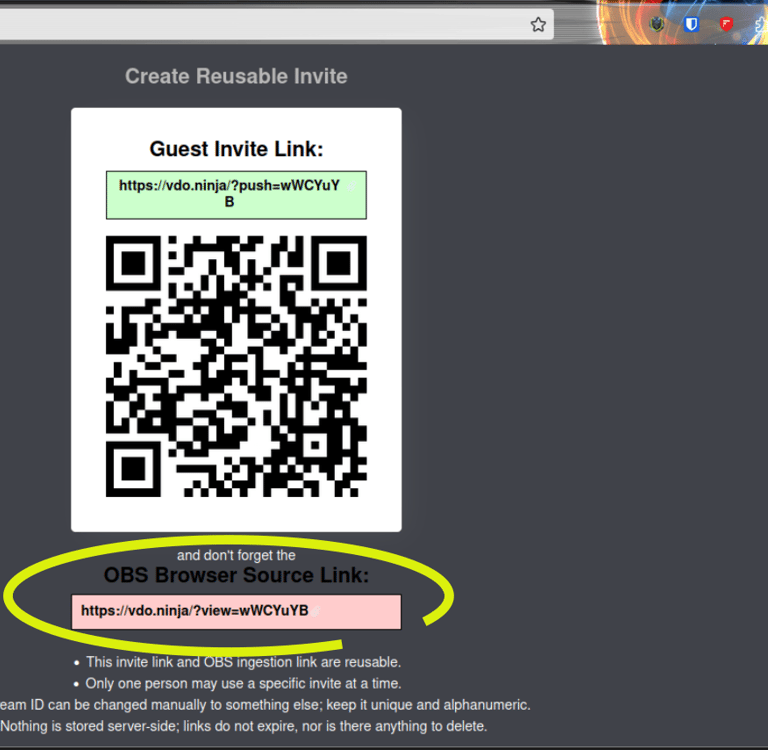
Select "Create Reusable Invite
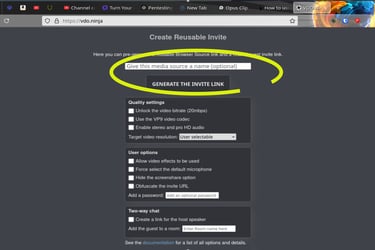
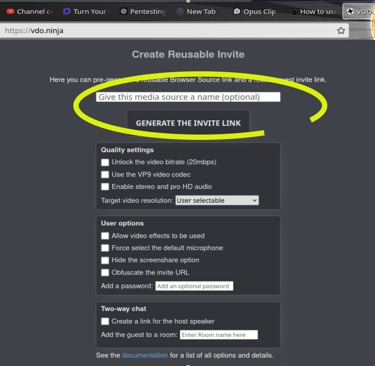
I recommend giving a name to the source
I haven't needed to make any other selections on this page yet, but it's worth noting they are available
Select "GENERATE THE INVITE LINK"
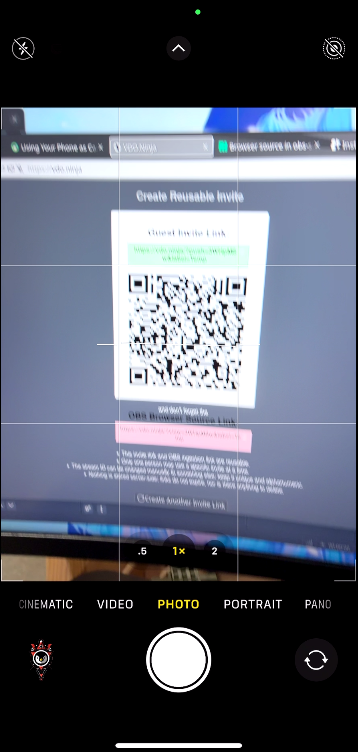
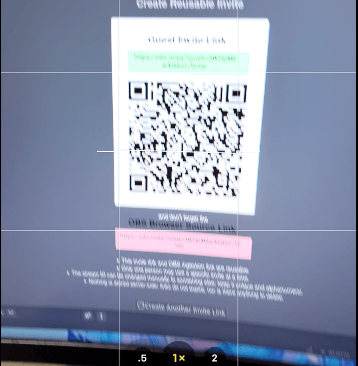
Open the camera app on your iPhone, and scan the generated QR code
Leave the page pulled up
I recommend to save the page your iPhone opens in the browser as a favorite/bookmark - that way, you have a shortcut to it for next time!
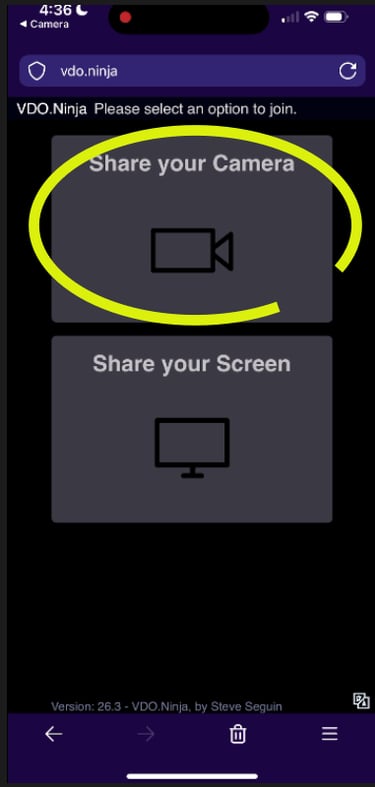
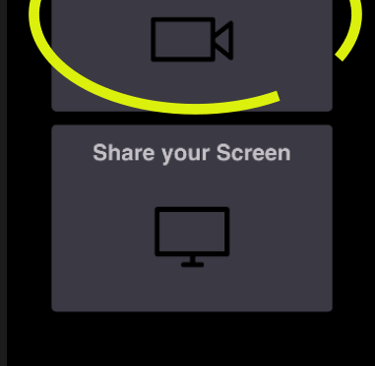
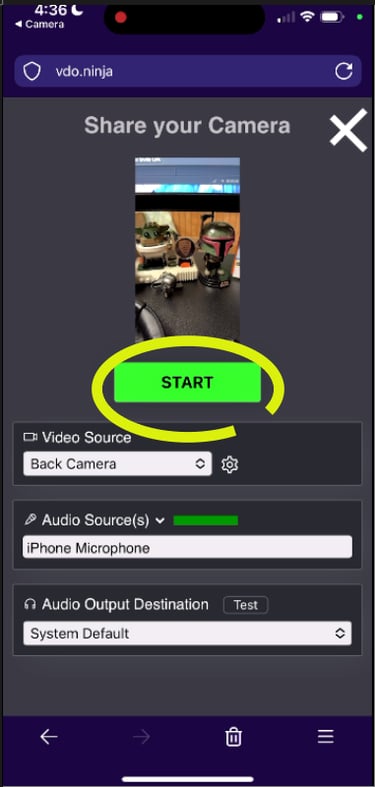
Select "Share your Camera"
Allow the appropriate permissions for Camera and/or Microphone access
Once the connection is established
Select which camera to use
Front, back, wide (which is actually a cool, fisheye effect), etc.
Select whether to use iPhone Mic
For this guide, leave the "Audio Output Destination" as "System Default"
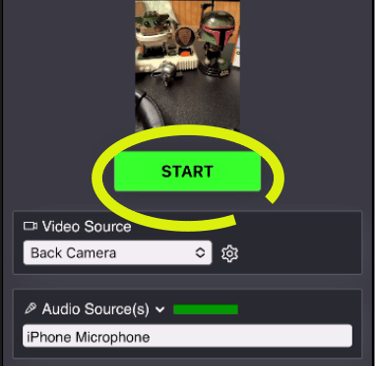
Select "START"
3. Connect OBS Studio to vdo.ninja
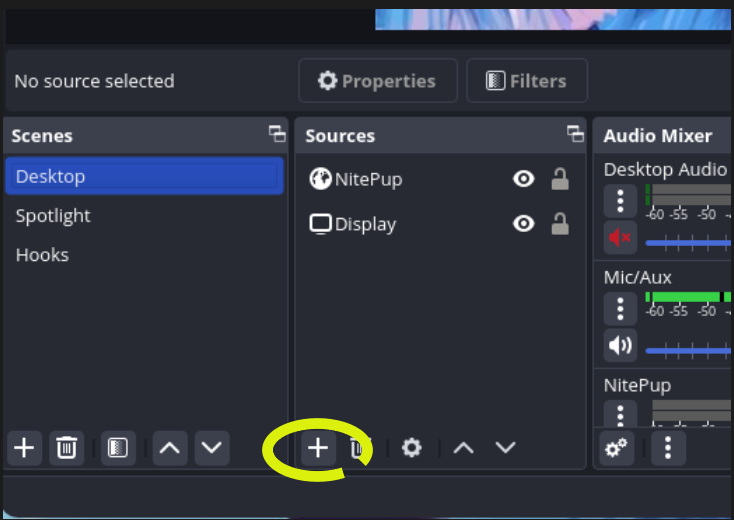
Open OBS Studio
Add (+) a new "Scene", if necessary
Otherwise, add (+) a new "Source"
Select "Browser"
Return to your web browser which had the QR code, select the address for the "OBS Browser Source Link" to add it to your clipboard
Did you overlook the sub-step which mentioned to leave it open? You're not alone; I only thought to include that note because I needed to restart the process, myself! Lolz -- Just trying to take the frustration out of this equation for you
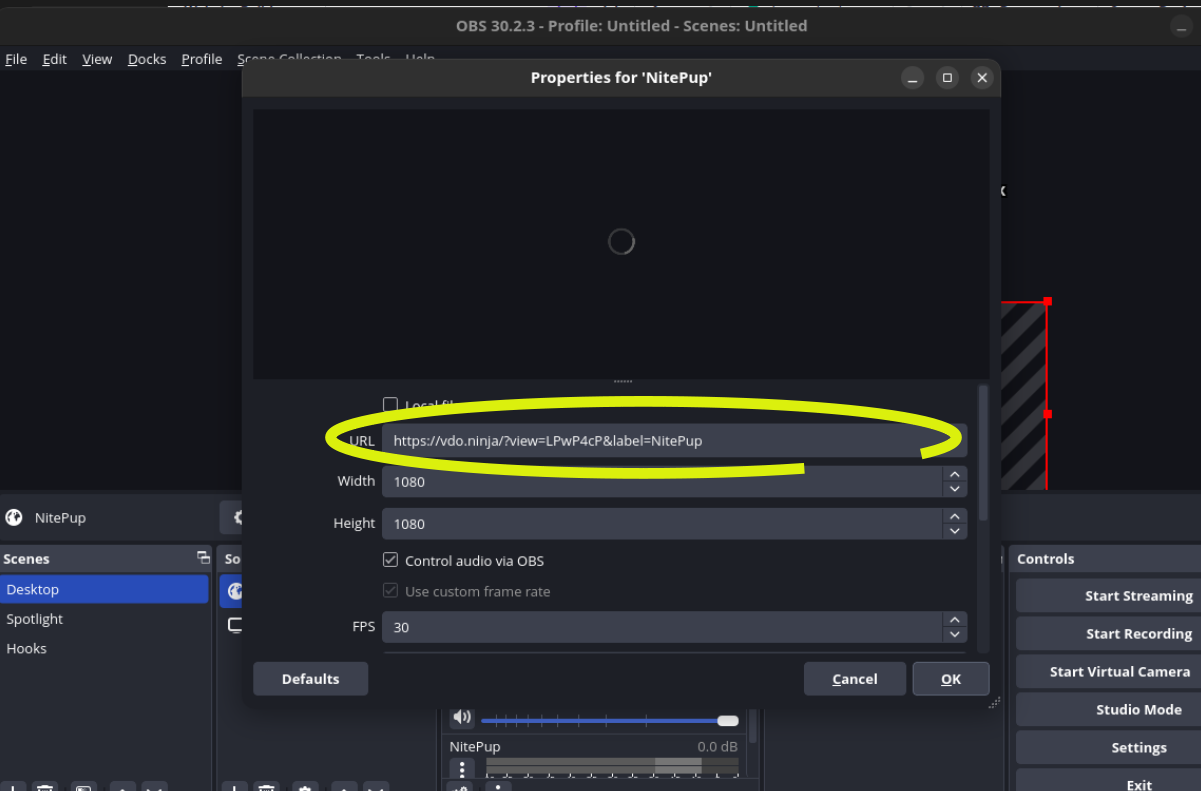
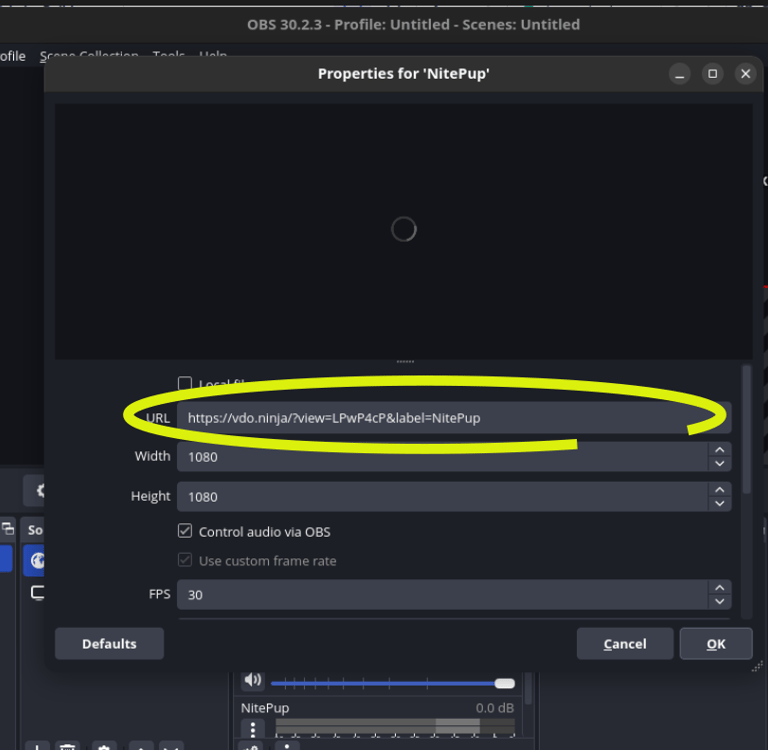
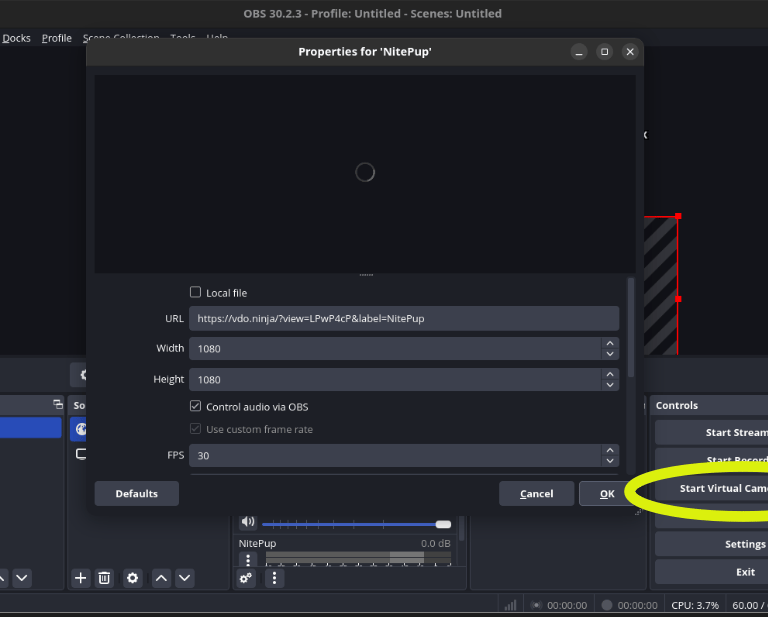
Return to OBS, and paste that address in the "URL" field
I haven't needed to change the other fields from default yet, but it's worth noting they are there
Select "OK"
And PRESTO!
You should be seeing your phone's camera feed in the "Preview area"!!!
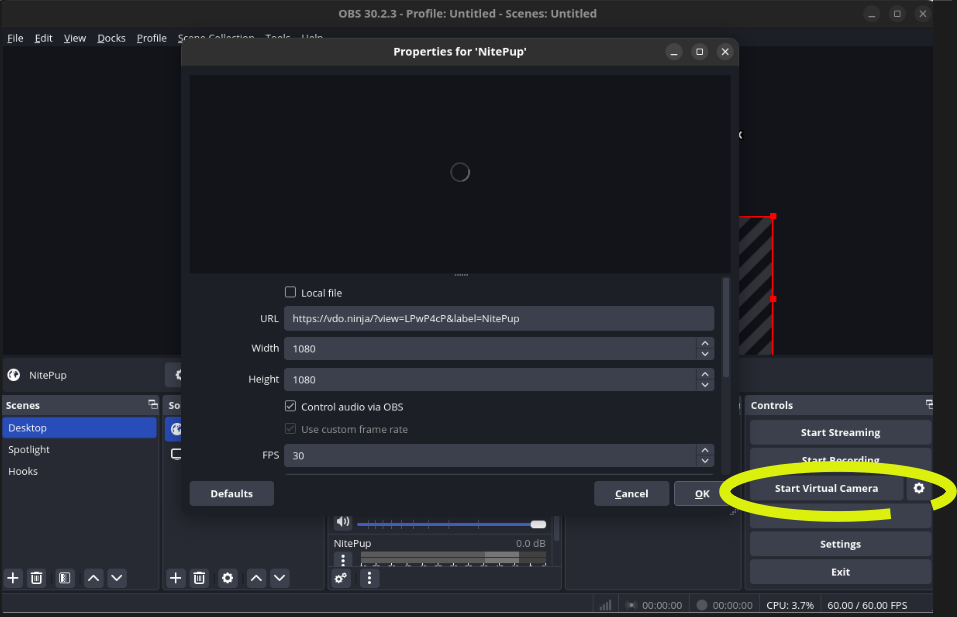
To us your new, high quality camera source as a video source for video conferencing/chats, just select the "Start Virtual Camera" option. That's it!
Hack #2: Troubleshooting
We'll break this down by OS, then likelihood of the issues.
WINDOWS
If you are only using vdo.ninja for a SuperAwesome video source, it's very likely you are good to go. But if you happen to be here with any issues, it most likely has something to do with your audio because you're using you iPhone's mic to accompany the camera. You may possibly need to dig deeper in vdo.ninja's documentation, but this page is a good place to start.
The first thing you'll need to do is install the "VB-Cable Virtual Audio Device".
Next, check your "Advanced" settings in OBS Studio. Select the "Monitoring Device" to be our "Virtual Audio Device" (the "CABLE Input"). Then, disable "Windows Audio Ducking".
This should have gotten you good to go. If not, please shoot me an email to give me some feedback and additional steps to add to this blog later.
LINUX
Missing Browser Source
If you’re using a Linux-based OS (like manjaro), you might notice the “Browser Source” is missing in OBS Studio... You used the AUR package, didn't you? (Ask me how I know Lolz.)
The Solution:
Enable Flatpak in your system’s package manager
Flatpak for APT package manager (Ubuntu, Debian, Linux Mint, etc.):
sudo apt install flatpak
Flatpak GUI for these distros:
sudo apt install gnome-software-plugin-flatpak
Flatpak for RPM package manager (Red Hat, Fedora, Rocky, etc.):
sudo yum install flatpak
Flatpak for openSUSE:
sudo zypper install flatpak
Flatpak for Arch-based (I use manjaro btw):
sudo pacman -S flatpak
Switch to Flatpak
Install OBS Studio via Flathub (https://flathub.org/)
Missing Virtual Camera
Yup, I had this issue as well. Luckily, it's still a well documented issue, with only a few steps to fix. Check the github page: https://github.com/obsproject/obs-studio/wiki/install-instructions#prerequisites-for-all-versions
Basically, you just need to make sure the 'v4l2loopback' package is installed. The github page above breaks it down by distro, but you'll also need the appropriate kernel module. For my fellow manjaro users, too easy:
sudo pacman -S linux512-headers
(I didn't include the other Arch-based users because what are the chances they even need help with this? Lolz)
MacOS
You shouldn't need to troubleshoot. You should be able to just connect your iPhone as an additional video source... but this method was almost just as seamless!!!
Conclusion
With these simple steps, you can turn your iPhone into a high-quality webcam. Whether you’re streaming, recording, or joining a virtual meeting, these hacks will save you time and frustration.
If this guide helped you, let me know! There are several way's to contact me at the bottom of this page.
Share your setup or any tips you’ve discovered. I'd love to know if there's any other troubleshooting I should add to this post.Don’t forget to subscribe to my channel, Brews ‘n Hacks, for more tutorials like this!
KIA ORA!